GE SR750/760 Relay Tutorials - Part 1: Download and Install EnerVista 750/760 Setup

Welcome to the first part of GE SR750/760 Relay Tutorial series. In this tutorial, I will show you how to download and install EnerVista 750/760 Setup. Click the link below to see the introduction about the tutorial series.
GE SR750/760 Relay Tutorials
EnerVista 750/760 Setup is the main required software when connecting or testing the GE SR750/760 relay. In this software, the users are able to:
  • Program or configure the I/O of the relay
  • Enable and disable the protection elements depend on the requirements of the system
  • Monitor or check the actual data values when online and offline
  • Program of configure setting file when offline
  • Write the setting file into the relay
  • Simulate the operation of the I/O of the relay
  • Download or extract the relay settings and save to file
  • Modify single or multiple settings of the protection element online and offline
To download the software, GE website (www.gegridsolutions.com) will require you to register on their website. To get approved quickly, you must use your corporate/company email address.

Search it from google or any search engine that available in your computer and click "Enervista 750/760 Setup Software" to download the software


Or navigate to https://www.gegridsolutions.com/app/ViewFiles.aspx?prod=750&type=7 then click the link to download.


If you are not logged in, sign in to their website or create a new account to have an access


Click the download button and save to file.


The file name should be similar to this "750Setup7xx.exe" in this tutorial "750Setup746.exe".


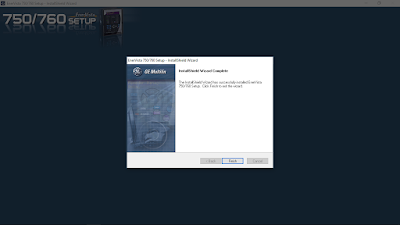
Run the installer and follow the instruction.


Once installed, run "EnerVista 750 Setup" software located in you desktop or in your start menu.

Summary:

In this tutorial, you have learned how to download and install the EnerVista 750 Setup software.

In the next part, I will show you how to use EnerVista 750 Setup software. I will show you how to connect to the relay and change the current settings or upload/download the relay settings.

That's it. See you next time.


Part 2: Connect laptop to GE Multilin 750/760 Relay and Upload/Download Relay Settings

Comments

Popular posts from this blog

Micom SE Studio1 Import Filter - Creating User Interface (UI)

Welcome to my page and welcome to the continuation of Omicron Import Filter tutorial series. In this tutorial, I will show you how to create the actual import filter fom Micom relays. In this tutorial, we will focus on the Visual Studio program. We're going to modify the codes in our project called MyImportFilter that we've created in the previous tutorial.  Download the project in this link  MyImportFilter - Process Relay Setting Parameters . Extract and open the project. Once the project is loaded, add New Folder inside the project and set the name to SEStudio1. We need this to make organize our project class filter.  SE Studio 1 stands for Schneider Electric Studio 1 which is the software that used in communicating MiCOM relays particularly P12x series. And yes we're going to create a new import filter and user interface form MiCOM P12x series relay. I think this will applied to other MiCOM P series relay. Add a new Form inside the  SEStudio1 folder  and set the name to

Processing The Relay Setting Parameters In Omicron Import Filter

Welcome to my page and welcome to the fifth part of Omicron Import Filter tutorial series. In this tutorial, I will show you how to process the relay setting parameters that to be import in the Xrio converter. In this tutorial, we will focus on the Visual Studio program. We're going to modify the codes in our project called MyImportFilter that we've created in the previous tutorial.  Download the project in this link  MyImportFilter - Process Relay Setting Parameters . Extract and open the project. Once the project is loaded, add New Folder inside the project and set the name to SEStudio1. We need this to make organize our project class filter.  SE Studio 1 stands for Schneider Electric Studio 1 which is the software that used in communicating MiCOM relays particularly P12x series. And yes we're going to create a new import filter and user interface form MiCOM P12x series relay. I think this will applied to other MiCOM P series relay. Add a new Form inside the  SEStudio1 fo

Write An Encrypted Text File In Visual Basic

There are many ways to encrypt text or data. In this tutorial, DESCryptoServiceProvider class to encrypt and decrypt strings using the cryptographic service provider version of the Triple Data Encryption Standard algorithm. The use encryption to protect secret data and to make data unreadable by unauthorized users. Creating encryption wrapper Open the previous project from this tutorial  Write Text To File In Visual Basic  then rename it to WriteTextToFileWithEncryptionVB or create a new project. I recommend to open the existing project to easily follow this tutorial. Create the Encryption3DesWrapper class to implement the encryption and decryption methods. 1 2 3 Public NotInheritable Class Encryption3DesWrapper End Class Add an import of the cryptography namespace to the start of the file that contains the Encryption3DesWrapper class. 1 2 3 4 5 Imports System.Security.Cryptography Public Class Encryption3DesWrapper End Class In the Encryption3DesWr